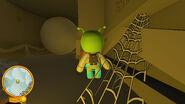
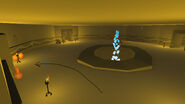
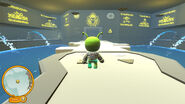
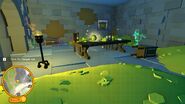
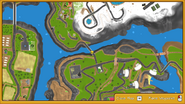
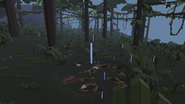
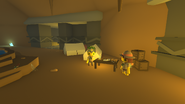
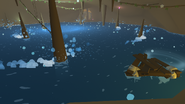
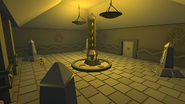
One aspect of gameplay in Wobbly Life is the puzzles that can be attempted that reward the player with outfits, presents, and achievements. There are currently four puzzle chains to attempt, with seemingly more to be added in the future. They can be attempted again any time, so that if something is missed it can still be obtained.
The Temple Puzzles[]
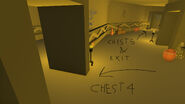
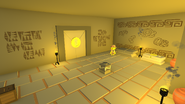
After an explosion breaks down the entrance wall a lift can take the player down to the Temple interior and its puzzles. Once inside the player cannot use their flying clothing pieces and they respawn at the start of whichever puzzle they have gotten up to. For exact chest locations with images refer to the guide.
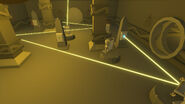
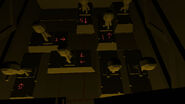
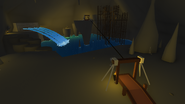
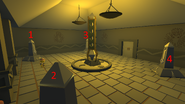
The first obstacle is getting to the end of a corridor while dodging swinging blades. The player then gets to a larger room that contains a puzzle that involves using mirrors to direct a beam of light to crystal indents on pedestals to open doors. The door on the left contains the first chest containing the Explorer Hat gift, while the door on the right shows a clue on how to complete the next puzzle. When the player eventually gets the centre path open they continue onwards to a room where the floor is made up of many square tiles. If the wrong one is stepped on they fall down and the player must attempt it again. Once completed the path remains up and all the other tiles fall down so that its easier to backtrack. Just past the doorway into the next room and to the player's left is the second chest, hidden by pots, containing two gifts and the Mummy Bottoms.
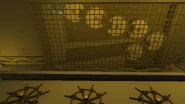
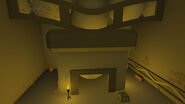
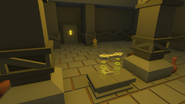
The next puzzle involves moving a blue orb out of a machine by using wheels to position stone cylinders with a slot in them to transport it to where the player can grab it. The orb can be put in a pedestal which then activates the boulder puzzle and opens up the way forward, but nearby is the third chest containing the Explorer Top gift. The orb is one of the two used to unlock a secret pet, with the fastest way to retrieve it being to backtrack, therefore not worth keeping hold of for the first completion of the Temple. A guide to its use outside of the Temple is on the Secrets page. The spiral corridor has alcoves the player can duck into to avoid the boulders as they keep coming down, but staying close to the wall also works well. At the end is a circular room with three doors, but the only one to worry about is the left one. There is another left doorway, where the fourth chest containing three gifts and the Mummy Top is, and a right doorway which leads to the way out of the maze and the fourth chest containing the Explorer Bottoms.
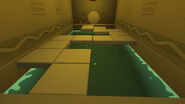
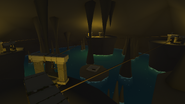
The final large room is filled with a lot of water and requires a puzzle to be completed to make a path rise up out of the depths. First, follow the path round to the opposite end of the chamber to find the sixth chest containing two gifts and the Mummy Hat. The puzzle is a memory one which requires the player to step on buttons to repeat a pattern one step at a time. When all path pieces have raised up the player can reach the treasure room where two final chest containing three gifts each are, as well as the same lift used to enter acting also as the exit. The player gets an achievement for completing the Temple whether they got all collectibles from the chests or not.
The Waterfall Puzzles[]
Behind the North most Waterfall on Jungle Island is a long dark tunnel with two puzzles to solve, two gifts to collect, and an orb to take that is used to unlock a secret pet. The first puzzle involves sliding statues in a small room in such a way that one can be moved outside of the room. Just outside is an indent in the floor which opens the way forward and a gift in the tunnel beyond.
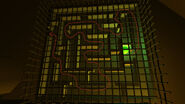
The second puzzle involves a green orb inside a maze the player must use their weight and position to move around. The puzzle is a little tricky when due to being at the mercy of the orbs gravity physics, but with patience the orb can reach the exit hole and be in the player's reach. The orb when put in a pedestal opens the way forward and reveals more of a tunnel. This leads to another gift, which gives the Devil Outfit, and the way out from the side of the cliff at the West Beach.
The Sword Cave Puzzle[]
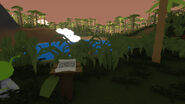
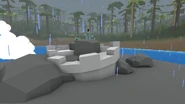
On Jungle Island, South of the lake at the end of the waterfall river is a scroll with a clue on it. It tells the player that when a thunderstorm occurs a sword will appear in the lake and it must be taken somewhere else. The weather has a 5% chance of becoming a thunderstorm, which means a lot of real life time could be spent waiting for this to occur. When this happens the top of a castle on a mound of earth will appear in the lake with a glowing sword in the centre. When grabbed the player will receive the Knight Outfit and must bring the sword to the next part of the puzzle.
At the most North part of the Mountain Island, between the land and the smaller islands, is a hidden cave that must be sailed or flown into. A ghost knight waits for the correct sword to be placed in a gap in the floor, surrounded by many incorrect swords. When the glowing sword is placed in the slot a door will open and the player will get an achievement. Inside the vault is a chest containing three gifts as well as a set of Ghost Knight Outfit that unlocks for the player when interacted with.
The Ancient Wobbly Trials[]
The Archaeologist:
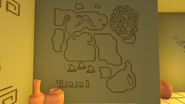
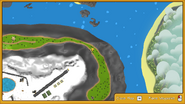
To begin the Ancient Wobbly Trials, you must first talk to an archaeologist on Jungle Island. The archaeologist will explain that you will need to find four scrolls to help unlock the door in the room. This door leads to the four trials you must complete later. After talking with the archaeologist, you will receive a key. This key will help you unlock the chests that contain scrolls. You can locate these four scrolls in four different caves around the world. You can find the locations of the four scrolls on the wall in front of the archaeologist.
Scroll 1:
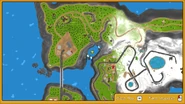
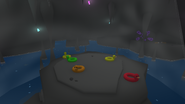
For the scroll on the top left, you must go to the middle of a lake and jump into the cave entrance (you may reference the images below for locations). You will fall down and land on an island filled with many duck pool floats. Hop into a duck pool float and find three buttons scattered around the cave. When you locate all three buttons, you will have a bridge to walk across. Cross the bridge and use a pickaxe to break the amethyst crystal on the wall. An entrance will appear. You may take the amethyst crystal geode artifact with you to take it to the museum to complete the cave collection.* Hop into the boat and navigate down the river. Along the right side of the river, you will come across the chest that contains a scroll. Interact with the chest to obtain the scroll.
*There is also a sapphire in a different cave at the golf course. Just saying this in case you want to complete the cave collection.
Scroll 2:
Next, there are two scrolls on the right side of the mountains in two separate caves. For the scroll higher up on the mountain, it is in a cave filled with bombs. In the middle of the cave is a hole surrounded by water. You must drop three bombs into this hole. To throw bombs into this hole, you must pick up a bomb with one hand and use your other hand to grab onto the zipline. Once you are approaching the hole, let go of the bomb in your hand while you continue holding onto the zipline. Once you have thrown three bombs in, a new section of the cave will appear. There will be a chest in this new section that contains a scroll. You can use the pickaxes in this area to mine the ruby crystal on the wall for another artifact.
Scroll 3:
For the scroll lower on the mountain, you will need to complete a few parkour obstacles in the cave. The first obstacle is a rock path on the left. When you jump onto one of the rocks, that rock will fall into the water shortly after. Therefore, you must get across quickly. The next obstacle you must face has water that will push you off the edge. You will need to time yourself based on when the water will erupt out of the pipes. The third obstacle features four trampolines. You will need to bounce yourself from one trampoline to the next without falling into the water below you. At the end of the trampoline obstacle, there will be a chest with a scroll in it. Interact with the chest to obtain the scroll. The next obstacle is a wooden structure that you will need to navigate to the lower platforms without falling into the water below. Once you've completed this obstacle, there will be a large candle at the end. You can interact with the candle to obtain a candle hat. Afterward, you can head to the zipline to return to the cave entrance.
Scroll 4:
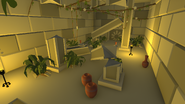
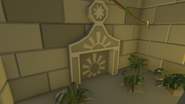
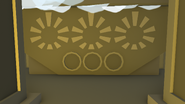
For the last scroll, it is best to use a boat. You can find the cave entrance for this scroll under a green bridge (you may reference the images below to help you find the location). Inside the cave, you will find a room with many vases and broken columns. You will also find many circular rock objects with images of stars and the moon on them. The first puzzle in this cave requires you to find the one with the sun on it. You will need to break some of the vases in the room to find the one with the sun. Once you've found the piece, place it on the door, and it should open. For the second puzzle, three images will light up. You will need to find three circular rock objects with the same images shown. Once you have them all, place them on the wall in the same order the images light up. Once you have completed the second puzzle, return to your boat and go down the river inside the cave. Continue down the river until you find the chest with the scroll. Once you've found the chest, interact it. There is also jade crystals to the left of the chest. You may break it with the pickaxes nearby to obtain an artifact for the museum.
Note: The solution to the second puzzle varies with each attempt at the cave.
Collect the Trial Hat
Once you have all four scrolls, return to the archaeologist. The archaeologist will give you the location for the trial hat. The entrance to the cave for the trial hat is next to the giant statue in Jungle Island. Once you fall down, the first obstacle you will encounter involves crocodiles, wooden logs, and two islands. You will need to use the crocodiles, wooden logs, and islands to hop across to the other side. Once on the other side, you can find a room with two archaeologists inside. Talk to the archaeologist on the right with a star above her head to obtain the trial hat. Grab the trial hat and move on to the whirlpool obstacle. There is a wooden raft in the whirlpool. You will need to wait until the raft is close to you. Once it is, jump on top of the raft. Stay on the raft until you get close to the other side of the room. Once you are close to the other side, hop off the raft. Make sure you don't fall into the water! There will be an elevator after the whirlpool, and it will take you to the cave's exit. After you exit the cave, return to the archaeologist that sent you to retrieve the trial hat. Once you have finished talking with the archaeologist, the door becomes unlocked.
The First Trial
You will need to wear the trial hat you had just unlocked to complete the four trials. You can equip it from the wardrobe in the same building as the archaeologist or the chest in the first trial room. In the first trial, you will need to light up the four pillars in the correct order using the trial hat (an image of the solution is below if needed).
The Second Trial
The second trial requires you to walk across an invisible path to reach the other side. To temporarily reveal sections of the path, you can use the trial hat's ability on the pillars.
The Third Trial
In the third trial room, there are five gray circles on the ground. These gray circles will rise when you hit their activator on the wall with the trial hat's abilities. They should help you reach a platform at the top of the room. Start by standing on the circle closest to the door. The activator should be near the archaeologist standing in the room. Hit the activator with the trial hat's ability and find the next activator. Once you hit the next activator, make sure to move to the next platform before it rises higher than the platform you are on. Continue this process until you reach the top.
The Fourth Trial
For the last trial, you will need to complete a race using the ancient hoverboard. Once you finish the race, you will have completed the Ancient Wobbly Trials and unlocked the ancient hoverboard.


